There’s something magical about the first cool days of autumn—that shift when the air becomes crisp and dry, when you wake up with a slightly scratchy throat, when your skin feels parched no matter how much lotion you apply. In my family, these signs of fall mean one thing: it’s time to make Korean pear drink.
This isn’t just any beverage. This is a traditional Korean remedy that’s been made for centuries, a drink so simple it seems almost too easy, yet so effective and delicious that it’s become one of my most anticipated fall rituals. Just three ingredients—Korean pears, water, and rock sugar—steamed together in a special double-boiler method that extracts every bit of sweetness and medicinal properties from the pears.
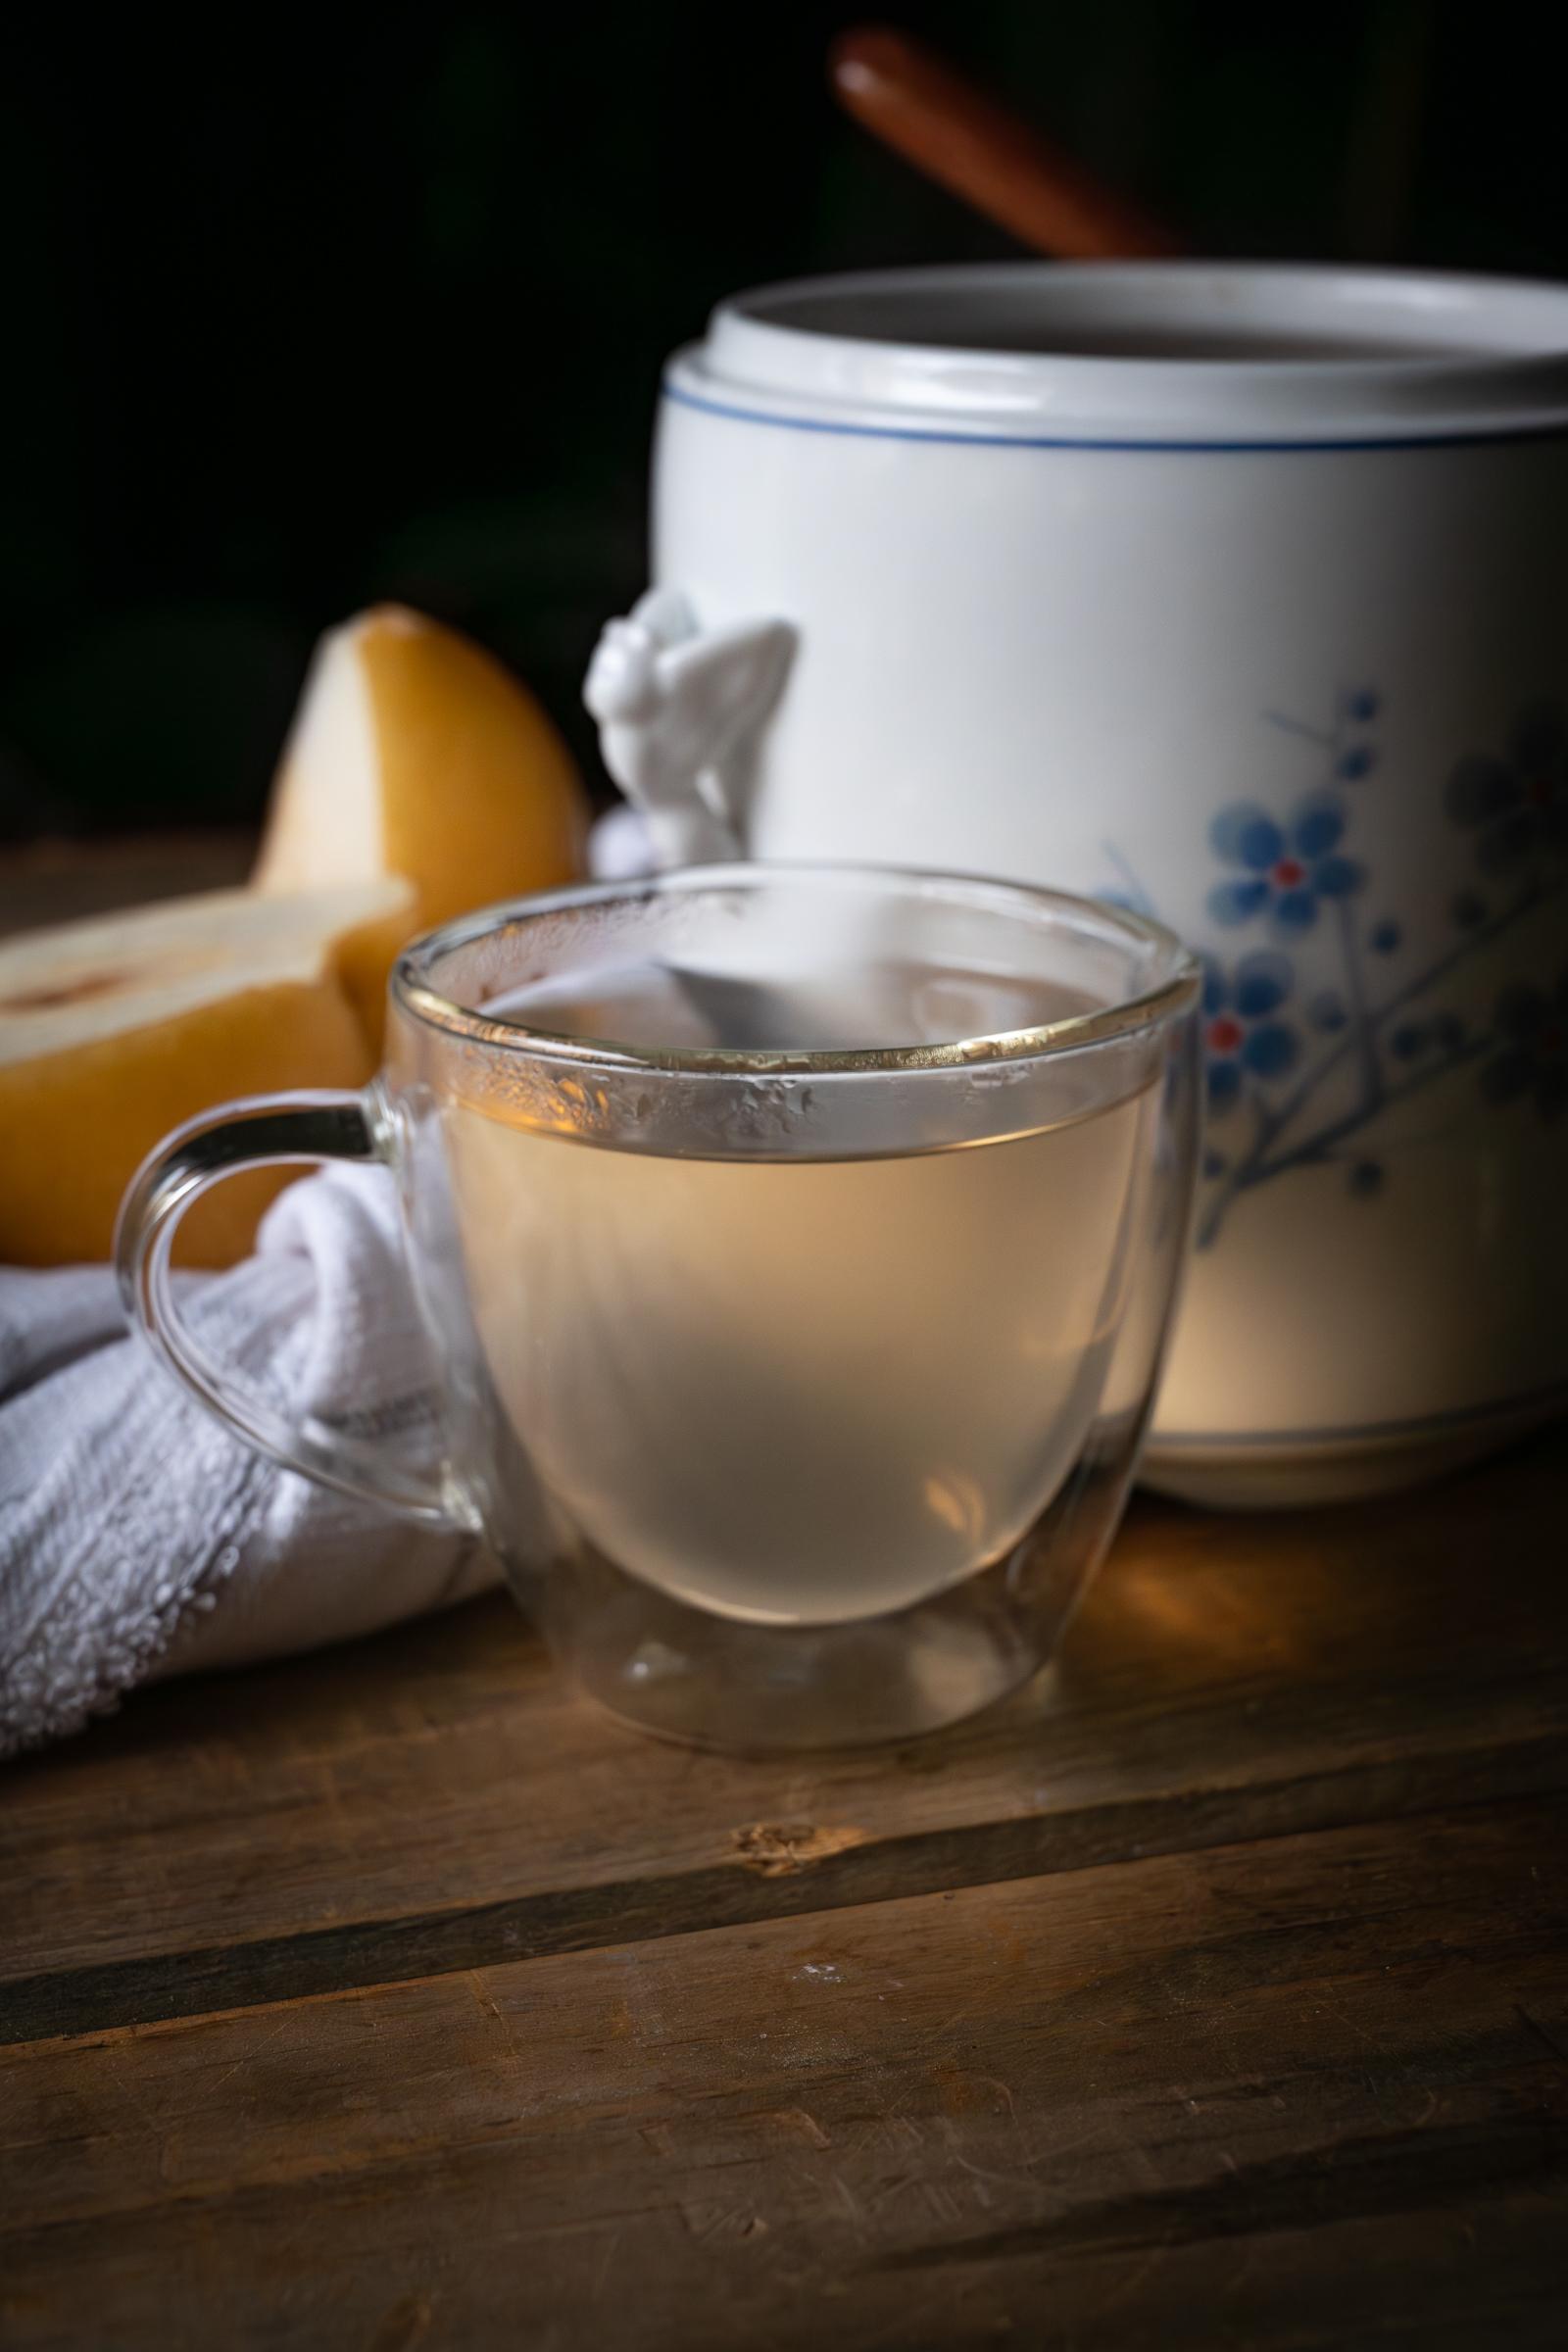
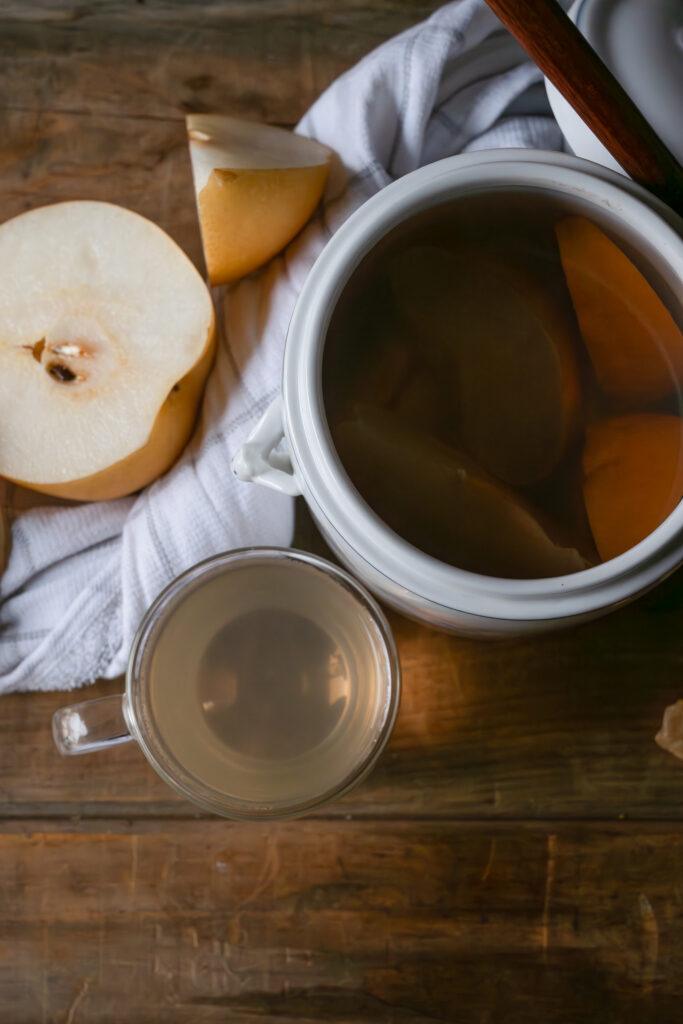
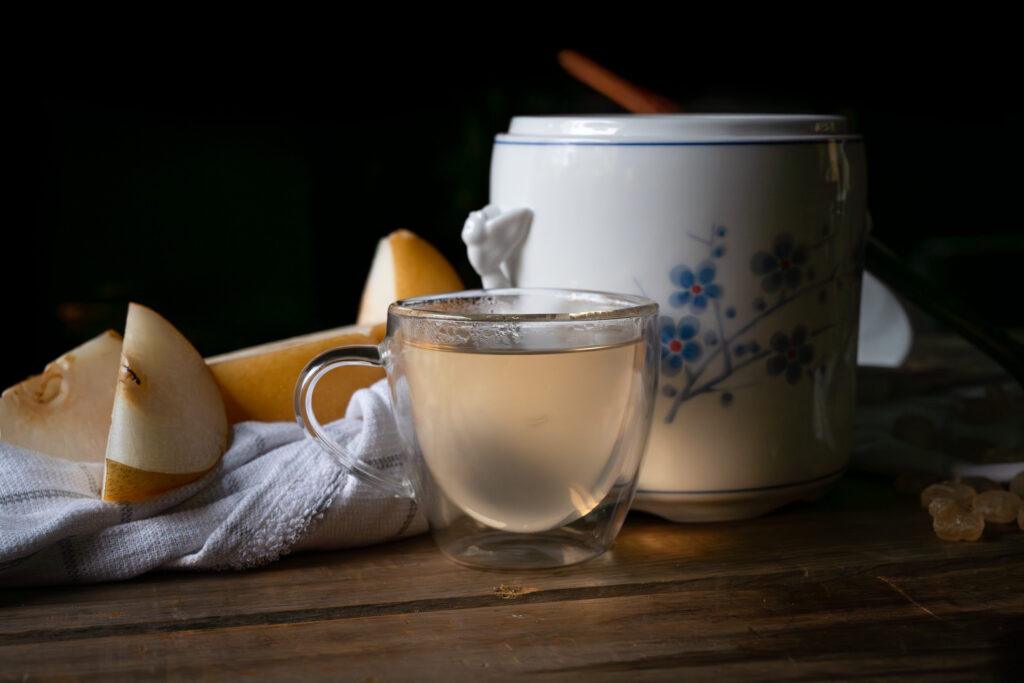
The result? A golden, slightly thick, incredibly soothing drink that tastes like liquid autumn and feels like a warm hug for your throat.
Let me show you exactly how to make this fall favorite that’s perfect for dry weather and sore throats.
What Makes This Drink Special
Before we dive into the recipe, let’s talk about what makes Korean pear drink so beloved. In Korea, this is called “bae-suk” (배숙), which literally means “cooked pear.” It’s traditionally consumed during fall and winter, particularly when someone is dealing with a dry cough, sore throat, or the effects of dry weather.
Korean pears (also called Asian pears or “bae” in Korean) are naturally moistening and cooling according to traditional Korean medicine. When steamed slowly with rock sugar, they release a sweet, slightly viscous liquid that’s incredibly soothing to drink. The slow steaming process—not boiling directly, but steaming in a water bath—is crucial. It gently extracts the pear’s natural juices and properties without destroying them with high heat.
This is comfort in a cup, tradition in liquid form, and one of the simplest yet most effective remedies for fall and winter discomforts.

The Three Simple Ingredients
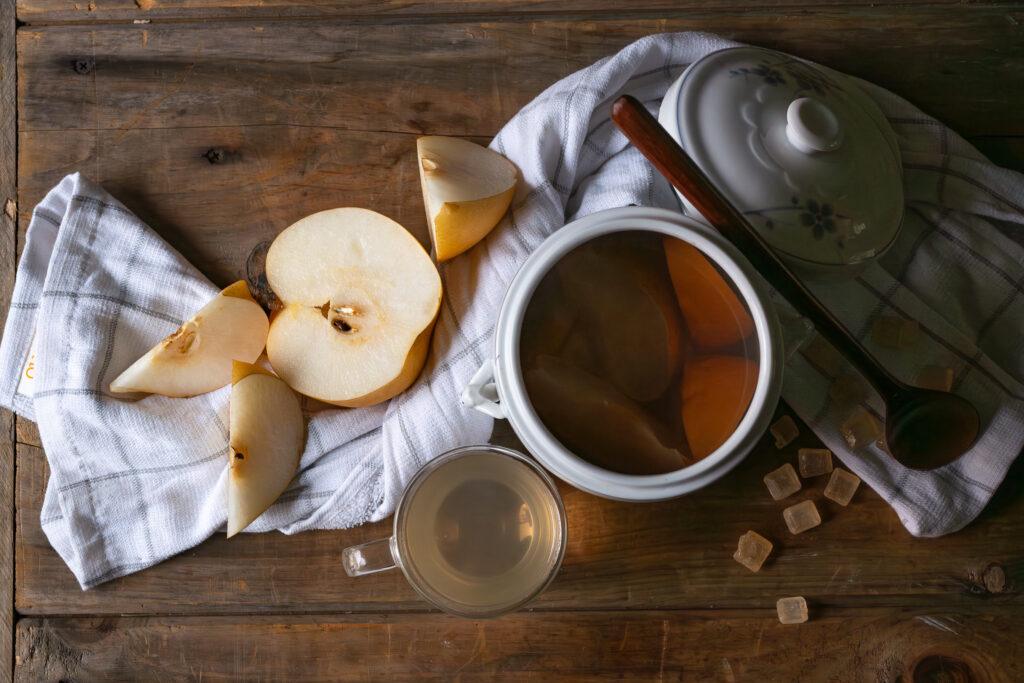
Korean Pears (Bae): 2-3 large Korean pears Rock Sugar: 3-4 pieces (adjust to taste) Water: Enough to fill your steaming pot
That’s it. Three ingredients. No complicated additions, no long lists of spices. The pear is the star, and everything else just helps coax out its natural goodness.
About Korean Pears
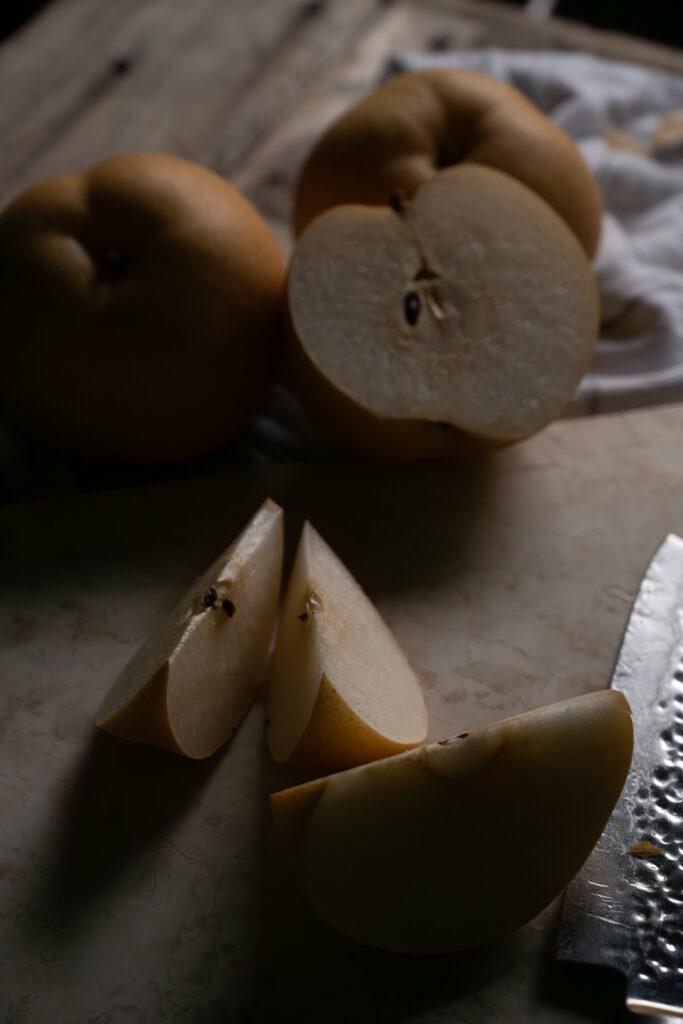
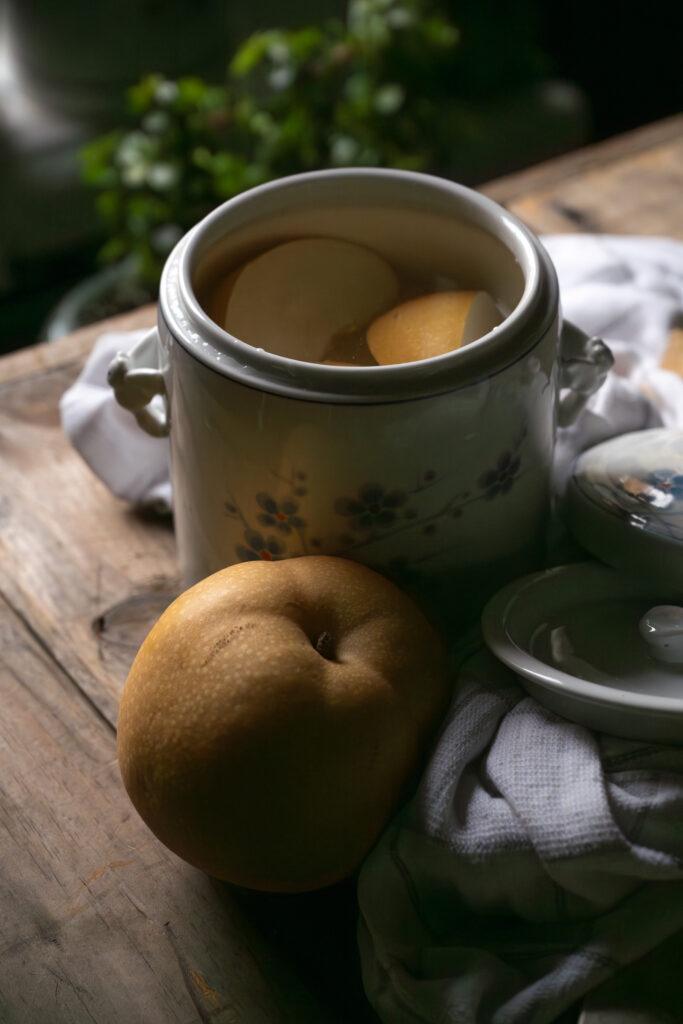
Korean pears are different from regular Western pears. They’re round like apples, with sandy-beige or golden-yellow skin. The flesh is white, crisp, and incredibly juicy—almost like a cross between an apple and a pear in texture. They’re much crunchier than regular pears and have a refreshing, mild sweetness.
You can find Korean pears at Asian grocery stores, especially Korean markets, and increasingly at regular grocery stores in the fall when they’re in season. They’re usually sold individually and can be a bit pricey (often $2-4 per pear), but for this recipe, you’re getting a lot of liquid from just 2-3 pears, so it’s worth it.
If you absolutely cannot find Korean pears, you can use Chinese Asian pears (which are very similar) or even regular Bosc or Anjou pears in a pinch, though the flavor and texture will be slightly different.
About Rock Sugar
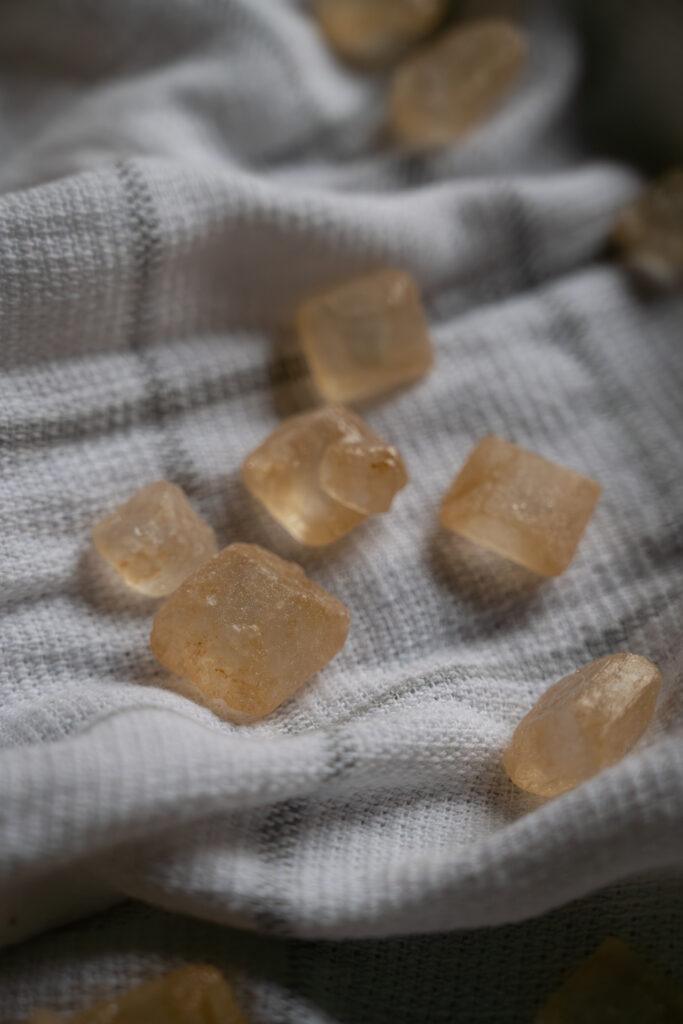
Rock sugar is those large, irregular amber or clear crystals that look like actual rocks or chunks of glass. It’s commonly used in Asian cooking and traditional medicine. You can find it at any Asian grocery store, usually in the baking or tea section.
Rock sugar dissolves slowly and has a cleaner, less cloying sweetness than granulated sugar. It’s the traditional choice for this recipe and really does make a difference in the final taste. A small bag costs around $3-5 and lasts for many batches.
The Essential Equipment: The Steaming Pot
Here’s where this recipe gets specific about equipment. You need a particular type of pot setup to make this properly, and it’s worth understanding why.
What You Need:
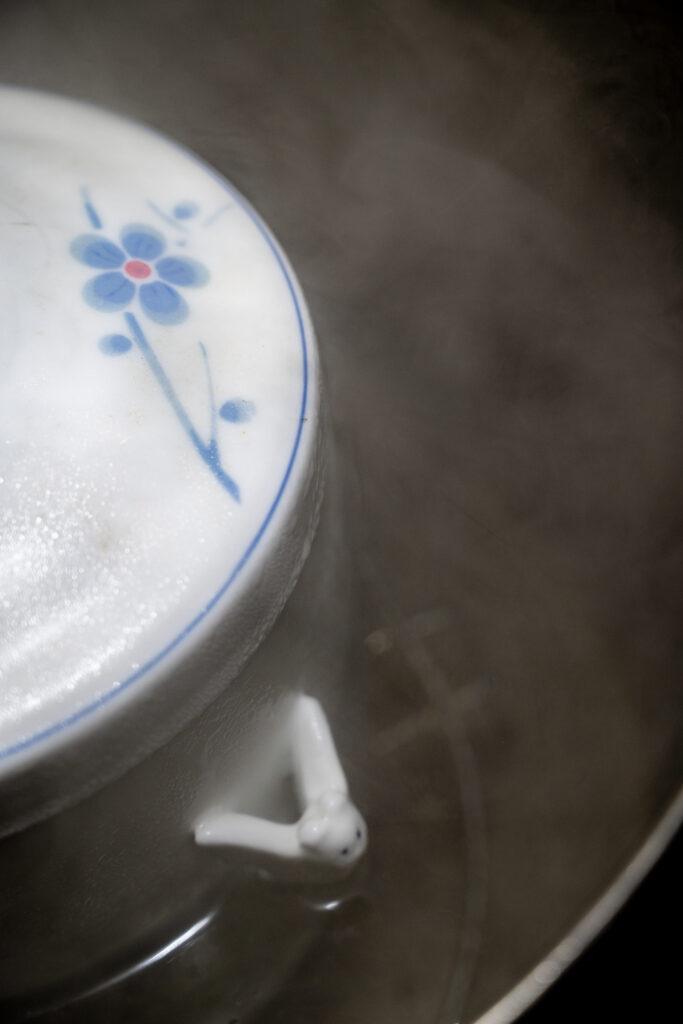
- A tall-style steaming pot with handles – This is a tall, narrow pot (often called a “ddukbaegi steamer” or double-boiler insert in Korean cooking) that will hold your pears, sugar, and water. It should have handles so you can lift it in and out of the larger pot. Porcelain is the best material for this – it conducts heat gently and evenly, and doesn’t impart any metallic taste. These pots are often 6-8 inches tall and can hold about 4-6 cups of liquid.
- A large tall pot with a lid – This is your outer pot that will hold water for the water bath. It needs to be tall enough that your steaming pot can sit inside with room to spare, and wide enough that water can circulate around the steaming pot.
- A raiser or steamer rack – This goes in the bottom of the large pot to keep your steaming pot elevated above the bottom. This prevents direct heat contact and ensures the water can circulate underneath. You can use a proper steaming rack, a heat-safe bowl turned upside down, or even crumpled aluminum foil formed into a ring.
Why This Double-Boiler Method Matters
The key to this recipe is that the pears are never in direct contact with the boiling water. Instead, they sit in their own pot, which is surrounded by boiling water in the larger pot. This creates a gentle, even heat that slowly steams the pears and coaxes out their juices without breaking down their beneficial properties.
Direct boiling would be too aggressive and would result in mushy, overcooked pears and a different flavor profile. The double-boiler water bath method is gentler, more controlled, and produces a superior drink with better texture and taste.
If you don’t have the traditional setup, you can improvise, but the principle remains the same: indirect heat through a water bath, not direct boiling.
Step-by-Step: Making Korean Pear Drink
Step 1: Prepare Your Pears
Start with 2-3 large Korean pears. Wash them thoroughly under cool running water, scrubbing the skin gently. Even though the skin is edible, you want to remove any wax or residue.
Now you have a choice in how to prepare them:
Method 1 – Peeled and cut: Peel the pears completely, remove the cores, and cut them into large chunks or thick slices. This exposes more surface area and the drink will be ready faster, but you lose some of the nutrients in the skin.
Method 2 – Whole with top cut off (traditional): Wash the pears and cut off just the top portion (like cutting a lid off a pumpkin). Use a spoon to scoop out the core and seeds, leaving a hollow cavity in each pear. This method is more traditional and looks beautiful, plus it retains more of the pear’s nutrients.
Method 3 – Cut in half: Simply cut the pears in half and scoop out the cores. This is a middle-ground approach.
I usually use method 2 when I’m making this for guests or want it to look special, and method 1 when I’m making it just for myself and want it done a bit faster. All three methods work beautifully.
Step 2: Set Up Your Steaming Pot
Take your tall-style porcelain steaming pot with handles and place your prepared pears inside. If you’re using the whole pear method with the tops cut off, they should sit upright in the pot. If you’ve cut them into chunks, just place all the pieces in the pot.
Add 3-4 pieces of rock sugar into the pot. If you’re using whole pears, you can place some rock sugar inside the hollowed-out cavity of each pear, and scatter the rest around them. If using chunks, just scatter the rock sugar among the pear pieces.
Now add water to the steaming pot. You want to fill it until the water comes about halfway up the pears, or about 2-3 cups of water depending on your pot size. Don’t fill it all the way to the top – leave about an inch of space at the rim because the pears will release their juices as they steam, and you don’t want it to overflow.
Step 3: Prepare Your Water Bath
Take your large tall pot and place the raiser or steamer rack at the bottom. Add water to the large pot – enough that it will come about halfway up the sides of your steaming pot when you place it inside, but not so much that it will spill into your steaming pot.
This is important: the water in the outer pot should NOT get into the steaming pot. The steaming pot needs to be surrounded by water, not floating in it or submerged. You want about 2-3 inches of water in the outer pot, depending on its size.
Step 4: Assemble and Start Steaming
Place your filled steaming pot (with the pears, rock sugar, and water) into the large pot, setting it on the raiser. The steaming pot should sit stably, elevated above the bottom of the large pot, surrounded by water.
Cover the large pot with its lid. Make sure it’s a tight-fitting lid to trap the steam inside.
Place the entire setup on your stove over medium-high heat. Bring the water in the outer pot to a boil. Once it’s boiling, you’ll see steam escaping from around the lid.
Step 5: Reduce Heat and Steam
Once the water in the outer pot is boiling, reduce the heat to medium-low. You want to maintain a gentle, steady simmer in the outer pot. The water should be bubbling but not rolling violently.
Now comes the patience part: let this steam for 2-3 hours.
Yes, hours. This isn’t a quick recipe. The long, slow steaming is what extracts all the goodness from the pears, creating that thick, sweet, medicinal drink. The pears will slowly soften, release their juices, and the rock sugar will dissolve completely.
Step 6: Monitor the Water Level
This is crucial: check the water level in the outer pot every 30-45 minutes. As it boils and evaporates, you’ll need to add more hot water to maintain the level. Keep a kettle of hot water nearby so you can top it off without disrupting the temperature too much.
Never let the outer pot run dry. If it does, you risk damaging your pot and the pears won’t steam properly. I usually set a timer on my phone to remind me to check every 30 minutes.
Step 7: Check for Doneness
After 2-3 hours, carefully lift the lid of the outer pot (watch out for the steam – it’s hot!). Using oven mitts or a thick towel, carefully grasp the handles of the steaming pot and lift it slightly to check inside.
The pears should be very soft and translucent, almost falling apart. The liquid should be golden-amber in color and noticeably thicker than when you started. There should be more liquid than you started with because the pears have released all their juices.
If the pears are still quite firm and the liquid is still pale, give it another 30 minutes.
Step 8: Remove and Serve
When your Korean pear drink is ready, carefully remove the steaming pot from the water bath using the handles. Set it on a heat-safe surface and let it cool for about 10 minutes.
You can serve this several ways:
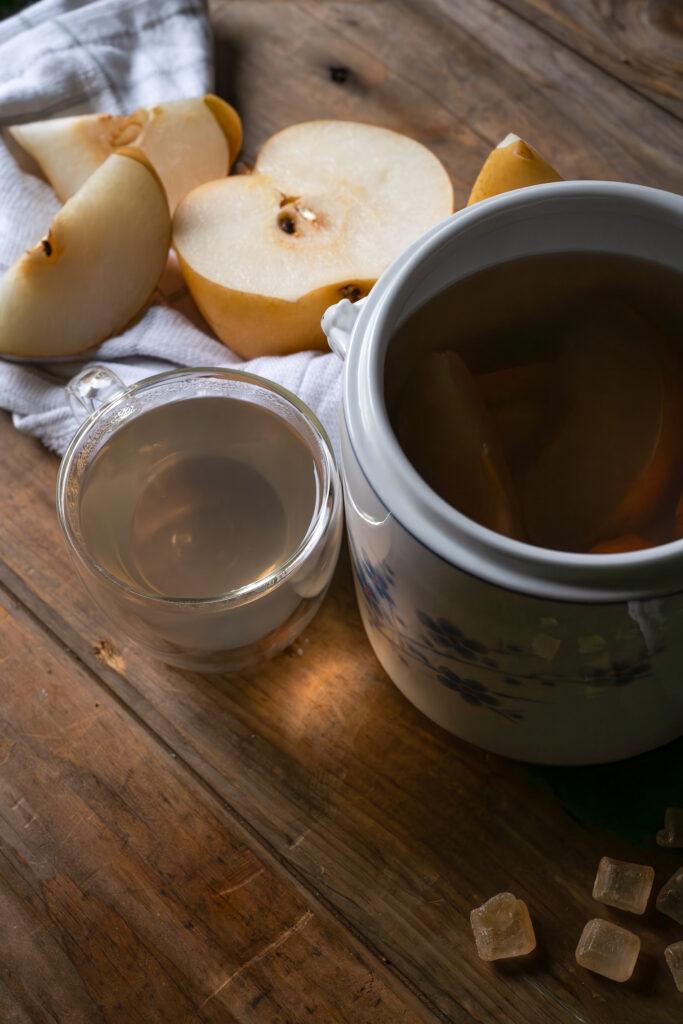
Drink the liquid: Ladle out the golden liquid into cups and drink it warm. This is the most traditional way and what most people do when they’re using it for sore throats or dry coughs.
Eat the pears too: The steamed pears are incredibly soft and sweet. You can eat them along with drinking the liquid, or after you’ve finished the drink.
Strain it: Some people prefer to strain the liquid to remove any pear pulp for a clearer drink. I usually don’t bother – I like the bit of texture.
How to Serve and Store
Serving Hot: This is traditionally served warm or hot, sipped slowly. The warmth is soothing for sore throats and the steam helps with congestion. Pour it into mugs or small bowls and drink it like tea.
Serving Cold: While less traditional, the cooled drink is also delicious. Let it cool completely, refrigerate, and serve chilled. It’s refreshing and still soothing, just in a different way.
Storage: Store any leftover drink in an airtight container in the refrigerator for up to 5 days. The liquid may separate slightly as it sits – just stir it before serving. Reheat gently on the stove or in the microwave if you want to drink it warm.
The pears: The steamed pears will keep in the fridge along with the liquid. They make a nice soft, sweet snack or can be mashed and added to oatmeal.
When to Make and Drink This
Korean pear drink shines in specific situations:
Fall and Winter: This is peak season for Korean pears and when the dry weather makes this drink most needed. I start making it in September and continue through March.
Dry throat: When the air is dry (hello, indoor heating!) and your throat feels scratchy and parched, this drink is incredibly moistening and soothing.
Sore throat: At the first sign of throat discomfort, I make a batch of this. The natural properties of the pear combined with the warm liquid provides real relief. Note: This isn’t a substitute for medical treatment if you’re actually sick, but it’s wonderful for minor throat irritation.
Dry cough: Korean pears are traditionally used for dry coughs. The drink seems to help soothe the irritation that causes coughing.
After heating: If you’ve been in heated, dry environments all day, this drink helps rehydrate and rebalance.
Just because: Honestly, this drink is delicious enough that you don’t need an excuse. It’s a lovely fall beverage to enjoy on a cool evening.
The Taste and Experience
If you’ve never had Korean pear drink, here’s what to expect: It’s naturally sweet but not cloying – the sweetness comes from the pears and rock sugar working together. The liquid is slightly thick and viscous, almost syrupy but not quite. It has a delicate pear flavor that’s more subtle than eating a fresh pear – it’s gentle, soothing, almost floral.
The texture is smooth and coats your throat as you swallow, which is part of what makes it so effective for throat discomfort. It’s not medicinal-tasting at all; it’s genuinely pleasant to drink.
The temperature matters. When drunk warm, it’s comforting and soothing, like a hug from the inside. The warmth itself is therapeutic. When drunk cold, it’s refreshing and still has that moistening quality.
Tips for Success
Choose ripe pears: Your pears should be ripe but still firm. Overripe, mushy pears won’t work as well. Underripe pears will take longer to steam and won’t release as much juice.
Don’t rush it: The long steaming time is essential. If you try to speed it up with higher heat, you’ll just boil the outer pot dry and won’t get the same gentle extraction of the pear’s properties.
Watch that water level: This is the most common mistake – letting the outer pot run dry. Set reminders on your phone if you need to.
Adjust sweetness: Some people use more rock sugar, some use less. Start with 3-4 pieces and adjust in future batches based on your preference.
Porcelain matters: If possible, use a porcelain steaming pot. Metal can work but may impart a slight metallic taste. Porcelain or ceramic is ideal.
Size of steaming pot: Make sure your steaming pot is tall enough to hold the pears and water comfortably without being too full. You need room for the pears to release their juices.
Troubleshooting Common Issues
My liquid is too thin/watery: You either didn’t steam it long enough, or you used too much water. Next time, use less water in the steaming pot and steam for the full 2-3 hours.
My pears didn’t break down: They weren’t ripe enough, or you didn’t steam long enough. Give it more time.
The outer pot kept boiling dry: You need to check it more frequently. Set a timer every 30 minutes. Keep hot water ready to add.
It’s not sweet enough: Add more rock sugar next time, or add some to the finished drink and stir until dissolved.
The drink is too sweet: Use less rock sugar next time. You can also dilute it with a bit of hot water if it’s too sweet after making it.
Water got into my steaming pot: Your outer pot had too much water, or it was boiling too vigorously and splashing up. Use less water in the outer pot and keep the heat at a gentle simmer.
Making Larger Batches
Want to make more at once? Simply use a larger steaming pot and add more pears. The ratio stays roughly the same:
- For every 2-3 large pears, use 3-4 pieces of rock sugar and 2-3 cups of water
- Double the pears, double everything else
- The steaming time remains about the same (2-3 hours) regardless of batch size
I often make double batches in a large porcelain pot, which gives me enough drink for 4-5 servings. It keeps well in the fridge and is wonderful to have on hand throughout the week.
Why This Became My Fall Ritual
I’ll be honest – the first time I made this, I wondered if it was worth the effort. Three hours of steaming for a drink? Couldn’t I just blend a pear with some water and call it good?
But there’s something about the slow process, the traditional method, the patience required. In our world of instant everything, there’s value in slow cooking, in waiting, in tending to something for hours until it’s ready.
And the result is genuinely different from anything you could make quickly. The flavor is deeper, more complex. The texture is perfect. The medicinal properties seem stronger. It’s not just pear juice – it’s something that’s been transformed through time and gentle heat into something more.
Now, when the weather turns cool and the air gets dry, I actually look forward to making this. I set up my pots in the morning on a weekend day, check on them periodically while doing other things, and by afternoon, I have this beautiful golden drink ready.
It’s become a marker of seasonal change for me. The first batch of Korean pear drink means fall has truly arrived. It’s become a ritual I anticipate, a tradition I’m creating in my own life.
A Note on Variations (There Aren’t Many)
Unlike many recipes where I encourage experimentation, Korean pear drink is best kept simple. The beauty is in its simplicity – pears, rock sugar, water. That’s the traditional recipe, and it works perfectly.
That said, I have seen a few variations: (I urge you not to go overboard)
With ginger: Some people add a few thin slices of fresh ginger to the steaming pot. This adds a warming, spicy note and is especially good if you’re feeling a cold coming on. I don’t usually do this, but it’s a common variation.
With jujubes: A few dried red dates (jujubes) can be added for extra sweetness and nutrition. Again, not traditional to the simplest version, but not uncommon.
With honey instead of rock sugar: Some modern versions use honey. This changes the flavor slightly but still works.
But honestly? I keep it to the original three ingredients. Sometimes simple is perfect just as it is.
The Bottom Line
Korean pear drink with rock sugar is one of those recipes that seems almost too simple to be special, but it absolutely is. Three ingredients, a patient steaming method, and time create something that’s greater than the sum of its parts.
It’s perfect for fall’s dry weather, wonderful for soothing sore throats, and delicious enough to drink just because you want to. The special double-boiler steaming setup with the tall porcelain pot might seem fussy at first, but it’s what makes this drink work properly.
Yes, it takes 2-3 hours. Yes, you need specific equipment. Yes, you have to tend to it periodically. But the result is worth every minute – a golden, sweet, soothing drink that tastes like autumn and feels like medicine made with love.
This fall, when the air turns crisp and dry, try making a batch. Set up your steaming pot, add your pears and rock sugar, and let it work its slow magic. Three hours later, you’ll understand why this simple drink has been cherished for generations.
Welcome to November Fall. Welcome to one of its most comforting traditions.
Happy Brewing!
<3 Ann